Showing posts with label veggies you'll love. Show all posts

Saturday, November 22, 2008

For Your Thanksgiving Feast: Fresh Pumpkin Cheesecake & Roasted Fall Vegetables

alright folks, this is the time to get down and dirty in the kitchen.  dishes piling up in the sink and on the counter, one of the many courses baking, broiling, roasting and simmering.  the near-palpable smells of Thanksgiving filling the hallways throughout the house – onions, carrots, sage, pumpkin, sweet cranberries – and maybe some unfamiliar ones as new favorites are added to the annual feast. 

thanksgiving is one of my favorite holidays – I look forward to it for months, thinking about my favorite pistachio-mint-pomegranate stuffing, the big turkey, the many sides from which to chose.  this is a particularly special thanksgiving for me because it’s my first one as a chef – or at least a line cook – so my head is buzzing with menus showing off this years' autumnal bounty!  my goal this year: to make my pumpkin pie from fresh pumpkins, and instead of a pie to try a pumpkin cheesecake.  use the recipe below to satisfy everyone’s sweet tooth & mandatory pumpkin flavored dessert, but with twist.  (this recipe does not take as much time as it seems at first glance.  it’s fun to work with the real food rather than a can, and your guests will think you’re a true culinarian..try it out!)

and if you haven’t been to the farmer’s market yet, get down there and check out all the fall/early winter foods overflowing at each stand.  pick up some fresh vegetables to roast for your thanksgiving table – the ones in the recipe below are my suggestions but you can pick your own.  but definitely try out the Jerusalem artichoke – you will be happy you did!


*If you don’t have a Cuisinart to crush the graham crackers for the cheesecake, simply place them in a clean kitchen towel and roll over them with a rolling pin.

Fresh Pumpkin Cheesecake

 Crust:

2 cups crumbled graham crackers or butter biscuits

¼ cup turbinado (raw cane sugar, or light brown sugar)

½ cup unsalted butter, melted

Filling:

1 small sugar pumpkin, enough to yield 1 ½ cups of flesh after draining

3 packages cream cheese

3 large eggs

¼  cup packed light brown sugar

½ cup sugar

1 ½ teaspoons cinnamon

½ teaspoon freshly grated nutmeg           

½ teaspoon ground ginger

1 teaspoon cardamom

½ teaspoon lemon zest

½ teaspoon salt

1 teaspoon vanilla

¼ cup heavy cream


cheesecloth


For Pumpkin Puree:

1.              Clean the outside of the pumpkin with water. 

2.              Using a large serrated knife, cut pumpkin in half lengthwise and pull out all of the seeds (I like to save them for roasting).  Scoop out the dangly innards and throw away.  Cut each piece in half again, lengthwise.

3.              Using either a double steamer or a steamer basket with a large pot, fill with water until just above the steam holes.  Bring to a boil and add pumpkin, turning heat down to simmer. 

4.              Steam pumpkin for 30 minutes or until thoroughly soft – make sure to check that your water doesn’t completely evaporate and add more as needed, each time bringing back up to a boil and then down to a simmer. 

5.              Once pumpkin is done, remove from pot and place on cutting board. Scoop out the flesh and place in a bowl.  Using a hand/immersion blender, a regular blender, or hand mixer, blend pumpkin until completely pureed.

6.              Place a large piece of cheesecloth in a colander in the sink,transfer pureed pumpkin 

to cheesecloth. Bring all of the ends of the cheesecloth together and squeeze out excess moisture from the pumpkin.  Keeping the ends of the cheesecloth twisted so no puree leaks out, place something heavy over the puree (like a pot) and allow to drain for at least 20 minutes. 

For Crust & Filling:

1.  Preheat oven to 350°F. Mix graham cracker crumbs, sugar and butter until a crumb mixture forms, then press onto the bottom of a 9” – 9.5” springform pan.  Bake crust until golden, 8 - 10 minutes, and allow crust to cool.

2.  Beat cream cheese until smooth in a KitchenAid mixer or with a hand mixer.  Add sugars and mix well.  Add eggs one at a time.  Add pumpkin, seasonings, vanilla, and cream, and beat on medium speed to quickly incorporate all ingredients. 

3.  Pour filling over cooled crust.  Bake at 350° for 50-60 minutes.  The cake is done when you shake it and it stays mostly still but the middle still wobbles a bit.  Allow to cool completely.

4.  Refrigerate for several hours or overnight to allow flavors to develop.


* * * *


Roasted Fall Vegetables


2 medium Jerusalem artichokes/sunchokes

10 small potatoes

6-8 small carrots, greens attached

1 sweet potato

2 cups brussel sprouts

2 tablespoons EVOO + ½ tablespoon EVOO

1 teaspoon salt + ½ teaspoon salt

3 large sprigs rosemary

Fresh cracked pepper

2 large cloves garlic, skin on

2 bay leaves

  1. Preheat oven to 400.  Oil a roasting pan and set aside.
  2. Clean all veggies well.  Slice Jerusalem artichokes into ½” rounds, and chop potatoes into small 1” pieces.  Cut all but 1” of greens from the carrots.  Peel & cut sweet potato into thick slices. 
  3. Mix all veggies except brussel sprouts.  Chop 1 sprig of rosemary leaves and sprinkle on veggies.  Add 2 tablespoons olive oil, 1 teaspoon salt & pepper and mix well.  Spread out on oiled pan (saving the used bowl) - use 2 pans if necessary, so veggies are arranged in a single layer.  Add remaining sprigs of rosemary, bay leaves and garlic, and cover with aluminum foil.  Pierce several times with a fork.
  4. Bake for 20 minutes.  Meanwhile, cut off the very bottom of the brussel sprouts, then cut them in half.  Mix them in the bowl used for the other veggies, allowing them to be coated by the remaining oil & herbs.
  5. Remove foil and add the brussel sprouts.  Add remaining olive oil & salt (adding more if necessary) and bake for 20 minutes more. ***If you are cooking this as a side dish to meat, cook at the same time and add ½ cup of juices from the meat at this point.
  6. Turn oven to broiler and broil on high for 2-3 minutes until gently browned.
  7. Remove from oven and enjoy!


Monday, October 27, 2008

beet & carrot chips with sage crisps

the other day I spent my day off walking around the farmers market, sipping on warm apple cider (they had already run out of doughnuts…shame) and marveling at all the beautiful fall vegetables that adorned every stand. 

beets and carrots are still out in full swing, and I decided to grab a few of each to make a little homemade, healthy snack-food.  beets & carrots are wonderful because they’re both so naturally sweet, so they are a great choice for satiating a sweet craving.  beets help promote circulation, aid the liver, and help alleviate constipation.  carrots also promote elimination, as well as lowering blood sugar and acting as a tonic to the kidneys.  both carrots & beets help to purify the blood.

these beet & carrot chips are a great alternative to store bought chips – although they will not get nearly as crispy, they are still great!  they also have a nice autumny feel because of the sage, which turns deliciously crispy in the oven.  try them out with any excess veggies you might have from your CSA box this week, or go to your local farmers market, grab your ingredients, and get into your kitchen!

beet & carrot chips with sage crisps

2 large beets

2 large carrots

10 medium-large sage leaves + 2 sage sprigs

2 cloves garlic, skin on

extra virgin olive oil

2 teaspoons salt


Preheat oven to 375 and thoroughly oil a baking sheet – make sure it’s completely oiled or the beets & carrots will stick.  Bring a medium pot of water to boil.

Peel beets and carrots – careful, beets will stain!  Slice beets width-wise and carrots length wise into ¼” slices.  If carrots are long, you can slice them in half lengthwise as well.

Chiffonade sage, meaning slice sage lengthwise into very thin strips.

Once water is boiling, par-boil the veggies for 3 minutes.  Remove from water and toss in enough olive oil to coat them thoroughly.  Add salt & sage and mix well.  Lay out on the baking sheet in one row, making sure not to overlap the veggies or they will cook unevenly.  Lay out sage sprigs & garlic cloves over them. 

Cook for 25-30 minutes, flipping once midway through.  Allow to cool on a cooling rack.  If desired, add more salt to taste once they’re out of the oven.

Sunday, August 10, 2008

the in-laws go kitchen crazy: quick pickled veggies & Malaysian spicy chicken


when my future father-in-law, Peter, and his bride-to-be, Sharon, decided to tie the knot, we spent several hours pondering over what we could possibly get them in celebration of their wedding.  though they said no presents, there was no way we were going without one.  but what on earth could we possibly get them?  when the idea came to us we knew it was perfect – a private cooking class, in the comfort of their own home, with one of my favorite instructors from Natural Gourmet, Annie Kunjappy.

Annie arrived hauling fresh co-op produce and healthy grains & beans, ready for a day of South East Asian cooking (in honor of their upcoming honeymoon in Thailand).  as the kitchen became thick with the spicy aroma of sautéed shallots & ginger, she gave the lovebirds helpful information about knife skills, kitchen equipment, and most importantly, the food they were cooking. 

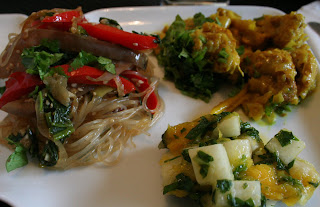
the menu itself was inspiring: mung bean sesame noodles with vegetables, a jicama & mango salad, quick pickled vegetables, Malaysian spicy chicken, and for dessert - sweet red beans & 

black rice soup with coconut cream.  below are two of Annie’s recipes from the class, the Malaysian spicy chicken and the quick pickled veggies. 


a quick note on pickling: people have been pickling food for as long as we’ve been on this earth.  it’s a way to preserve foods & their vitamins throughout the seasons while using only a small amount of resources.  also, the health benefits of pickled foods are plentiful, most notably that they aid in digestion and are rich in enzymes, which remain in tact throughout the pickling process.  (Note that pickled foods are added directly to an acid and are slightly different from fermented foods.  that’s a longer process and the acid is not added but rather released through a build-up of lactic acid.)


 Quick Pickled Veggies

 2 carrots

1 small daikon

1 cucumber

1 tablespoon sea salt

¼ cup rice vinegar (or brown rice vinegar)

1 tablespoon agave

Seed cucumbers, and cut all vegetables into thin strips.  Sprinkle with salt and press into colander for ½ hour and drain away all liquid that is extracted.  Toss in vinegar and agave and allow to marinate for at least an hour before use – overnight is best.

 *feel free to follow the recipe but you can also adjust the amounts or change up the veggies as you desire!


Malaysian Spicy Chicken

1 large onion, finely diced

1 teaspoon turmeric powder

1 pound chicken, boneless & skinless, cut in strips


Grind together (in food processor)

8 cloves garlic

2 inch piece ginger

8 shallots

3 green chilies (more or less to heat tolerance)

2 stalks lemongrass


2 tablespoons coconut oil

1 ½ cup coconut milk

1 lime or more to taste

½ cup chopped cilantro

sea salt to taste


Toss the chicken pieces with the turmeric until coated and set aside.

Heat up the coconut oil and sauté the onions over medium flame until just golden.

 Add the ground mixture of garlic, shallots, chilies, lemongrass and ginger.  Sauté for 5 minutes or until golden brown and fragrant.  Add a little coconut milk to prevent sticking if needed.  *(if you don’t have a food processor, cut the lemongrass into 2” pieces and let simmer with the dish, removing before serving)

Add the chicken and sauté for 2 minutes.  Add coconut milk, stir and lower flame to a simmer.  Cook until chicken is tender.

 Squeeze in the juice of one lime, add salt to taste.  Remove from heat and add cilantro.

Friday, July 25, 2008

squash blossom wings

last weekend while I was working at the farmers market (see entry below) I had a chance to walk around and fill up my bag with some fun summer treats. free farmed eggs, garlic scapes, green beans, walla walla onions….all delicious and fresh from the earth. but the crowned jewel was something I had never before used – squash blossoms. I had eaten them out but had never purchased them myself, so I decided to give it a try. turns out they’re extremely fun & easy to work with, with the added pleasure of being a scrumptious summer treat. they won’t be around much longer so make sure you try them out soon – and try to use them as soon as possible after buying or picking them.
this is just a very simple recipe I threw together the other night. play around with them though - you can slice them thinly and throw them into a salad raw, sauté them, or bake them stuffed.

** VEGAN option: try a white bean puree, caramelized onions & fresh herbs. use a beer batter instead of the eggs & breadcrumbs. my friend Melissa & I made these together this week also and they were absolutely delicious.

Squash Blossom Wings
12 squash blossoms
¾ cup herbed goat cheese
1 tablespoon finely chopped thai basil
1 egg
1 cup fine breadcrumbs*
a pinch of cayenne
½ cup coconut oil
sea salt

1. Wash squash blossoms and open up one side completely. If the stamen is big you can pick that out. Keep ½” of the stem on for the “wings” effect.
2. Mix together goat cheese and basil for filling. Using a small spoon, place a dollop of the filling in the center of the blossom, close up and twist the top so it’s sealed.

3. Beat egg and put in shallow bowl for dipping. Mix breadcrumbs & cayenne (and any extra seasoning you want to add) and put in a shallow bowl.

4. Heat coconut oil in a medium saucepan until hot – test this by dropping in a bit of the breadcrumb, if it sizzles immediately it’s ready. Dip squash blossoms in egg, coat with breadcrumbs, and place in oil. Allow to brown 2 minutes on one side, flip and cook 2 minutes on other side. Move to a paper towel-lined plate and sprinkle with salt immediately.

5.  Serve with a dipping sauce of your choice and a fresh salad for a great summer meal.

*instead of throwing out stale bread, make your own breadcrumbs: bake it at 400 degrees until it’s completely dried out and throw it in the food processor. pulse until it gets to the desired consistency & add salt to taste.


Monday, July 21, 2008

get your farm fresh summer squash party on


I grew up in a household where canned and boxed foods were a rarity, and nearly every night we were offered something fresh and hot for dinner. for a long time I rebelled against the healthy, wholesome food in our cupboards and begged instead for boxed mac & cheese with its powdered flavoring and bright orange coloring, or canned green beans (which, for some reason, I preferred eating straight from the can with chopsticks). over time, however, my taste buds have become more particular about the quality of food they enjoy, and my food choices are no longer limited to what I’m eating but also to where it comes from and how it was cultivated.

for me this exploration really took hold when my brother began exploring organic farming a few years back. as he took to the earth so did I. I started eating less fake meats & processed foods, and in turn realized how poorly my body reacted to them. I began to appreciate the quality of foods coming fresh from the earth in their proper season.

not everyone can live on a farm and grow their own food, but most of us can still reap the benefits of farm-fresh produce. becoming a member of your local CSA is one way to do this. joining a CSA – community supported agriculture - is like becoming a member of a local farm. you purchase a subscription and in turn receive weekly or bi-weekly shares of whatever is in season. this is a great way to support your local farmers and stimulate your local economy, and also to get in touch with the food you’re eating (you’ll notice a difference in quality, I promise). it’s also fun to experiment with familiar and new foods alike as they come in season.

you can also support your community farmers by shopping at local green markets or farmers markets. (check out a list of NY green markets here, organized by neighborhood) this week I worked my school’s booth at the green market, cooking up delicious & simple recipes with food donated by farmers at the market. (that's Suzanne on the right - a graduate of NGI who often heads our booth at the green market)

the featured vegetable this week was summer squash. this variety of oftentimes funky-shaped vegetables are low in calories and high in lutein, a pigment concentrated in the eyes which contributes to good vision. they’re also a great source of vitamins C & A, manganese, potassium, and magnesium. summer squash are said to have anti-inflammatory properties, helping to reduce symptoms in diseases such as rheumatoid arthritis. play around with this recipe skeleton (as in you can really add whatever you like to it) for a delicious & simple summer side dish:

Sauteed Summer Squash
yields 4 side dishes

½ cup pine nuts
2 lb variety of summer squash
1 tablespoon garlic, julienned or minced
5 large basil leaves, torn into small pieces
2 tablespoons extra virgin olive oil
salt and pepper

1. Dry roast pine nuts in a small skillet over low-medium heat about 3-5 minutes. Once oils have released and they are evenly browned, remove from heat immediately to avoid burning.

2. Cut squash according to their size. Long thinner squash (like zucchinis) can be julienned into long, thin strips. Round & disc-shaped squash can be cut into small dice. Do not discard the skin or seeds – those can be used!

3. Heat olive oil in medium skillet over medium heat and add garlic strips, stirring so as not to burn. Add squash and toss with garlic. Sautee squash about 5 minutes until all pieces are soft – you do not have to brown them but you can if you prefer.

4. Add pine nuts, and salt and pepper to taste, and mix together for 1 minute. Turn off heat, add basil & mix well. Serve hot or at room temperature.

Friday, June 6, 2008

eat my radishes

it was a couple of weeks into culinary school when I realized I was constantly thinking about and dreaming about food. between school, personal cheffing, and spending the weekends building up my catering business, I’ve been up to my shoulders in whole grains, organic vegetables, kombu strips, and the occasional pan fried seitan (see those sliders behind the blog title?). at night I would have dreams – vivid ones – of different foods I was cooking, or some slice I was trying to perfect. one food in particular often made its way into these dreams – each time it appeared I would be trying my hardest to slice paper-thin rounds of it, breaking open the vibrant pink globes to expose their pure white bellies.
ah yes, the radish. member of the cruciferous family, generally eaten raw with the stems discarded as trash. well I’d like to have my radish and eat it too – and I mean all of it. a natural digestive aid, radishes are high in potassium and folic acid. they are a cooling food, and ayurvedically-speaking are kapha & vata reducing. and it’s radish season, so why not try them.

this past weekend at the green market in Union Square I worked my school’s demo/tasting booth. we sautéed radishes and radish greens and handed out samples. simple as it is, people loved it. I had never eaten cooked radishes before and I loved it too. Below is the basic recipe for the dish we made, but you can really do it up your own way. You can switch up proportions of greens to radishes, or the order of cooking, and it will still come out delicious. give it a try:


Sauteed Radish Greens with Garlic

1-2 tbsp Extra Virgin Olive Oil
2 cloves garlic – regular or spring garlic, thinly sliced
5 bunches radishes thinly sliced (reserve greens)
Reserved greens, washed well & chopped into bite size pieces
Sea salt & cracked black pepper to taste


1. In a medium pan, heat oil over medium high heat, add garlic to pan and sauté for 1-2 minutes. 2. Add radishes, sauté until radishes begin to turn a pinkish color.
3. Add greens, salt and pepper and sauté for another 2-3 minutes.
4. Add greens, salt and pepper and sauté for another 2-3 minutes.

Serve with your choice fo grain. Copyright Sara Ross